Jekyll is one of the most static site generator (SSG). It empowers developers to generate static site quickly and easily. And this can be hosted on Github (with in-built support for Jekyll). Currently it is a great tool for building blogs, portfolios and other websites.

What Is Jekyll?
Jekyll is a website generator that’s designed for building minimal, static blogs to be hosted on GitHub Pages.
Jekyll’s Purpose
Tom Preston-Werner created Jekyll to enable people to blog using a simple static HTML website, with all of the content hosted and version-controlled on GitHub. The aim of Jekyll was to create SSG, that would eliminate complexity of blogging engines/platform available. And to allow a developer to blog like a developer.
In this article, we will discuss 10 best practices for building static website using Jekyll. Let’s dive-in and see best practices to be kept in mind:
Organize using Directory structure
Organizing Jekyll site into a directory structure helps keep all of the files and folders in order, making it easier to find what you need, when you need it. This becomes very important when your blog grows larger in size with time. An organized directory structure will make it easier for you to maintain and update with time
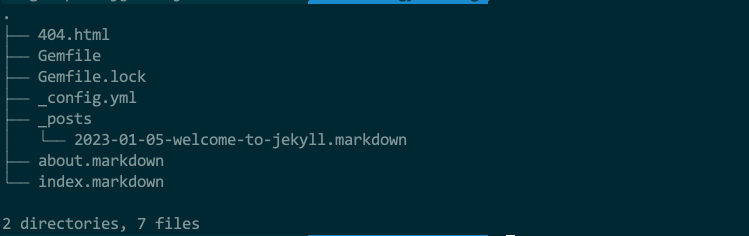
The best way to do that is to organize your Jekyll site is by creating separate directories for each type of content. For example, for posts, Jekyll gives use _posts directory, for contact us you shall create contact_us directory. If you are going to have few pages; put all of them under pages folder. For static assets; you could create a directory public and further divide them (i.e images, css, javascripts etc)
It’s also important to use descriptive names for your directories and files so that they are easily identifiable. This will make it much easier to locate specific files and folders when needed.
DRY using _includes (Reusable Code snippet)
The Jekyll uses _includes folder for include tag. Jekyll’s include tag is used to include a snippet into a page.
The _includes folder is a great way to keep your code organized and make it easier to maintain. It allows you to store snippets of Markdown, HTML, CSS, JavaScript, or any other type of code that can be reused throughout the website in one place. This makes it much simpler to update or change the code since all of the reusable pieces are stored together.
Using an _includes folder also helps with performance optimization. By storing commonly used code snippets in one place, they can be loaded once and then cached for future use. This reduces the amount of time needed to load pages on the website, resulting in faster page loads and better user experience.
Creating an _includes folder is easy. All you need to do is create a new folder in the root directory of your Jekyll project and name it _includes. Then, add the code snippets you want to reuse into this folder. You can organize them further by creating subfolders within the _includes folder if necessary. Once the code snippets have been added, you can reference them from anywhere in your project using Liquid tags.
{% include my_test_include.md %}
Leverage Liquid templating for dynamic content
Since Jekyll is a Static Site Generator, it uses Liquid templating language that enable developer to throw some dynamic content to save time and effort invested. It allows developers to add logic and control flow statements, such as conditionals (if/else) statements, loops (for), and filters, into their Markdown or HTML. This makes it easier to customize the look and feel of a website without having to write complex and lengthy code.
Using Liquid also helps keep code organized and maintainable. By using tags and variables, developers can easily access data from different sources and display it in an organized manner. This makes it easy to update or modify existing content without having to rewrite large chunks of code.
Leverage page front-matter variables to customize page and SEO
Front matter variables are a way to store data about the page, such as its title, author, and date. This allows for easy customization of page elements without having to manually edit each page.
For example, if you want to add an author name to every post on your blog, you can create a front matter variable called “author” and assign it a value. Then, in the template file, you can use Liquid tags to display the author’s name using site.author on each post. This eliminates the need to manually enter the author’s name on each post avoiding duplicity and creates single source of truth.
Using front matter variables also makes it easier to make global changes to your website. For instance, if you want to change the font size or color of all headings across your site, you can do so by editing the template files that contain that relevant Liquid tags. This saves time compared to manually changing the font size or color of each heading individually.
Take advantage of the collections feature to organize content
Collections are a powerful way to group related content together, making it easier for users to find what they’re looking for. For example, if you have a blog with multiple categories, you can create separate collections for each category and then assign posts to the appropriate collection. This makes it easy for visitors to browse through all of your posts in one particular category without having to search through every post on your site.
Using collections also helps keep your website organized by allowing you to store different types of content in their own folders. For instance, you could create a “pages” folder for static pages like an about page or contact page, and a “posts” folder for blog posts. This makes it much easier to manage your content since everything is stored in its own place.
Creating collections is simple and straightforward. All you need to do is add a _config.yml file to your Jekyll project and define the collections you want to use. You can then assign posts to the appropriate collection using front matter variables. This allows you to easily organize your content into logical groups that make sense for your website.
Separate data from presentation with YAML files
YAML stands for “YAML Ain’t Markup Language,” and it is a human-readable data serialization language. It’s designed to be easily read by humans, but also parsed by machines. YAML files are used in Jekyll websites to store data that can then be accessed from the website’s templates. This allows developers to keep their content separate from their presentation layer, making it easier to maintain and update the site.
Using YAML files makes it easy to add new content or make changes to existing content without having to manually edit HTML/Markdown code. For example, if you want to add a new blog post, all you have to do is create a new Markdown file with the necessary page front-matter (i.e title, author, date, etc.) and save it under the _posts folder.
Page front matter will be available in page using page object in liquid tag. To access title, you can use page.title. This makes it much faster and simpler to manage your content.
DRY Styelsheets using Sass and CSS partials
Sass is a CSS preprocessor that allows for the use of variables, functions, and mixins to make writing stylesheets easier. It also helps keep code DRY by allowing you to break up your style sheets into smaller files called partials. This makes it much easier to maintain and update your website’s styling as changes can be made in one place and will be reflected across all pages.
Partials are Sass files with an underscore at the beginning of their filename. These files contain snippets of code that can be imported into other Sass files using the @import directive. By breaking up your style sheet into multiple partials, you can easily organize and manage your code. For example, you could have separate partials for colors, fonts, layout, etc. This makes it easy to find what you’re looking for and quickly make changes without having to search through a large file.
Minimize JavaScript dependencies and leverage CDNs when possible
Minimizing JavaScript dependencies is important because it reduces the amount of code that needs to be loaded on a page, which can improve website performance. This is especially true for mobile devices, where loading times are often slower than desktop computers. Additionally, reducing the number of dependencies also makes it easier to maintain and update the site in the future.
Leveraging CDNs (Content Delivery Networks) when possible is another good practice for Jekyll websites. CDNs allow files to be stored on multiple servers around the world, so they can be accessed more quickly from different locations. This helps reduce latency and improves overall website performance.
It also ensures that the most up-to-date version of the file is always available, as CDNs automatically update their content whenever changes are made.
Optimize images for faster loading times
When a website is browsed, the browser must download all the images on that page before it can render page content. If image being used is large, this process can take longer; resulting in slow page load time. This can be more problematic for mobile user experience or users with slow internet connection.

Optimizing images helps reduce their file size without sacrificing quality. This makes them faster to download, which in turn improves the overall performance of the website page. There are several ways to optimize images for Jekyll websites. One way is to use a tool like ImageOptim or EasyResize to compress images while preserving their quality.
Additionally, you can also use responsive images so that different versions of the same image are served depending on the device being used. This ensures that visitors only receive the version of the image they need, further reducing load times.
In addition to what described, you can try lazy loading images using loading attribute of img tag.
Beware
loadingattribute may not be supported by every old browsers
Implement caching strategies for improved performance
Caching is a way of storing data in memory so that it can be quickly accessed when needed. This helps to reduce the amount of time and resources required to generate webpages, resulting in faster page loading times for visitors.
Caching static assets (i.e images, css and JavaScript), Jekyll generated websites can improve their page loading performance greatly
To implement caching strategies with Jekyll, developers should use a content delivery network (CDN) to store static assets. A CDN will serve these assets from locations around the glob. This reduces latency and improves website page load speed.
Additionally, developers should leverage browser caching by setting expiration dates on cached assets. This ensures that browsers don’t have to download the same asset every time they visit the site, further speeding up page load times.
About The Author
I am Pankaj Baagwan, a System Design Architect. A Computer Scientist by heart, process enthusiast, and open source author/contributor/writer. Advocates Karma. Love working with cutting edge, fascinating, open source technologies.
To consult Pankaj Bagwan on System Design, Cyber Security and Application Development, SEO and SMO, please reach out at me[at]bagwanpankaj[dot]com
For promotion/advertisement of your services and products on this blog, please reach out at me[at]bagwanpankaj[dot]com
Stay tuned <3. Signing off for RAAM